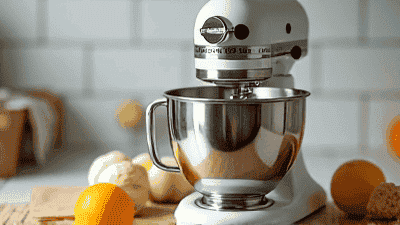
For many baking enthusiasts, a stand mixer is an indispensable kitchen appliance, transforming the laborious process of mixing dough, whipping cream, and blending ingredients into a smooth and enjoyable task. However, to ensure that your stand mixer remains a reliable culinary companion, regular cleaning and maintenance are essential. In this guide, we will delve into practical tips and strategies tailored for residents to keep their stand mixers in top condition, from everyday cleaning to in-depth maintenance.
Before diving into maintenance practices, it’s useful to understand how your stand mixer works and what components require attention:
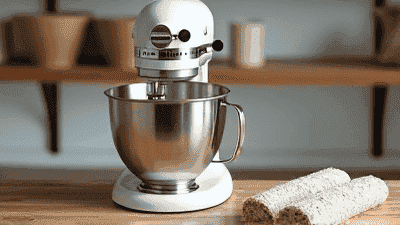
Bowl: This is where all the mixing happens. Depending on your model, it could be fixed or tilt-head.
Beaters and Attachments: These include the flat beater, dough hook, and whisk, each serving a specific purpose in the mixing process.
Motor: The heart of your mixer, it provides the power to mix ingredients efficiently.
Control Panel: This allows you to adjust speed settings and activate different functions.
Housing: This is the outer casing of the mixer that protects the internal components.
Each part plays a vital role in the functionality of your stand mixer, and proper care of these components is necessary to keep your appliance running smoothly.
Regular cleaning and maintenance of your stand mixer are crucial for several reasons:
Over time, ingredients can accumulate within the mixing bowl, attachments, and housing. Cleaning your mixer ensures that it operates at its best, producing superior results for your baked goods.
Just like any other appliance, regular care can significantly extend the lifespan of your stand mixer. By addressing minor issues and keeping the components clean, you can avoid the need for costly repairs or replacements.
Leaving food residue can create a breeding ground for bacteria. Regularly cleaning your mixer helps maintain food safety and ensures that your baked goods remain delicious and safe to eat.
A well-maintained stand mixer operates more efficiently. By keeping it clean, you ensure that the motor and other components do not have to work harder due to buildup and residue, which can lead to better energy use.
Cleaning your stand mixer is a straightforward process that can be performed after every use or at least once a week, depending on how frequently you bake. Here are the steps to clean your stand mixer effectively:
Before starting any cleaning process, always unplug the stand mixer. This ensures safety while handling components and prevents accidental activation.
Remove Attachments: Start by detaching any attachments you used, such as the flat beater, dough hook, or whisk. Most attachments can be removed by simply twisting them off or pressing a release button.
Take Off the Bowl: If your mixer has a removable bowl, detach it carefully. Depending on the model, the bowl may tilt or lift off.
Hand Wash or Dishwasher Safe: Depending on the material (stainless steel, glass, or plastic), your mixing bowl may be dishwasher safe. If it isn’t, wash it by hand using warm, soapy water.
Use Baking Soda for Stains: If you see stubborn stains or odors, create a paste with baking soda and water, applying it to the problem areas. Let it sit for a few minutes before scrubbing gently with a non-abrasive sponge.
Wash by Hand: Clean the attachments in warm, soapy water just as you would the mixing bowl. Use a sponge to scrub away any residue or grease. For attachments that cannot withstand the dishwasher (like some coated beaters), always clean them by hand.
Use Vinegar for Tough Residue: For any adherence from sugar-rich mixtures, soak the attachments in a mixture of vinegar and warm water for a while before washing.
Use a Damp Cloth: Wipe the housing of the mixer with a damp cloth to remove dust and spills. Make sure that no moisture enters the motor area.
Avoid Harsh Chemicals: Stick to mild soaps and cleaners, as harsh chemicals can damage the finish of your mixer.
After cleaning all components, allow them to air dry completely before reassembling. This helps prevent any buildup of moisture that could lead to bacterial growth.
In addition to regular cleaning, you may need to perform a deep clean on your stand mixer periodically. This more thorough cleaning process should be done every few months, or as needed.
Before starting deep cleaning, inspect all components for signs of wear. Check for cracks in the bowl and attachments or fraying cords. If any parts are damaged, consider replacing them to prevent future issues.
For any scuff marks on the mixer body, use a mix of baking soda and water for a gentle abrasive that won’t scratch the finish. Apply with a soft cloth, and then wipe clean with a damp cloth.
If your area has hard water, mineral deposits can build up inside your mixer. To descale:
Use White Vinegar: Create a solution of equal parts water and white vinegar. Wet a cloth with the solution and wipe down the areas that may be experiencing buildup.
Rinse Well: After descaling, wipe down again with a clean damp cloth to ensure all residue is removed.
Regular maintenance goes beyond cleaning and involves ensuring all components work seamlessly together. Here’s how to maintain your stand mixer effectively:
Look for Damage: Regularly check the power cord for fraying, cracking, or other signs of wear. If you see any damage, discontinue use and consider replacing it to avoid electrical hazards.
Clean Connectors: Use a dry cloth to wipe connectors to prevent dust buildup, ensuring a secure fit.
When not in use, store your stand mixer correctly:
Cover the Mixer: Consider using a protective cover for your stand mixer to keep it dust-free.
Remove Attachments: If storing long-term, remove all attachments and place them in a designated area.
Avoid Sunlight: Keep the mixer in a location away from direct sunlight to prevent fading and damage.
Even with regular maintenance, you may encounter some issues from time to time. Here are a few common problems residents might face and simple troubleshooting steps:
Check Power: Ensure that the mixer is plugged in correctly. Try a different outlet to rule out electrical issues.
Inspect the Motor: If the motor seems unresponsive, there may be a problem internally. Consult the manufacturer’s customer service or consider a technician.
Inspect and Secure the Bowl: If you hear grinding or squeaking noises, the bowl may not be aligned correctly. Check that it is securely fastened.
Check Attachments: Ensure attachments are the correct fit for your mixer. Loose or incorrect attachments can create noise during operation.
Adjust Bowl Height: If the mixer isn’t mixing ingredients properly, the bowl height may need adjustment.
Inspect Attachments: Ensure attachments are in good condition and appropriate for the type of mixing you are doing.
Add a Bit of Liquid: If you find thick mixtures lose contact with the beaters, consider adding a small amount of liquid to help it mix evenly.
Break Down Ingredients: For dense mixtures like dough, consider dividing them into smaller portions for more effective mixing.
Give It a Break: If your mixer is overheating, stop using it for a few minutes to allow it to cool down.
Check for Blockages: Ensure there are no clogged areas around the motor that could inhibit airflow.
In addition to maintenance, observing safety practices while using your stand mixer is essential. Here are some safety tips to keep in mind:
When mixing, always keep hands and utensils away from moving parts. Do not attempt to add ingredients while the mixer is running.
Familiarize yourself with the speed settings on your mixer to avoid splatter and ensure even mixing. Start on a low speed for initial mixing and gradually increase as needed.
Do not overfill the bowl. Excessive amounts can jam the motor and lead to overheating or other mechanical issues.
Always refer to your user manual for usage specifics and safety recommendations. Understanding your model’s capabilities will promote safe operation.
Cleaning and maintaining your stand mixer is vital for ensuring its longevity and optimal performance. Regular care leads to better baking experiences, helping you achieve perfect mixtures and delicious results every time. By following the guidelines and tips outlined in this comprehensive guide, you can keep your stand mixer in peak condition for years, allowing it to remain your trusted partner in baking.
By implementing routine cleaning practices, inspecting for wear and tear, and troubleshooting any issues as they arise, you can enjoy all the benefits of your stand mixer without worry. Happy baking, and may your future creations be as delightful as ever!